Hi Everyone!
I thought it necessary to make a little How To on the DIY Fab Pom Kits I am offering. Let's get crafting!
Here is what you'll need to make your pom:
Your Pom Kit: Faux Fur Square and ~80cm of hemp string or nylon cording
A good, THICK sewing needle- I got mine at my local craft store
Poly-fill. Also available at your local craft, fabric or even yarn store
OPTIONAL: Pliers, scissors if string is too long at the end

Step 1: Thread your string through the eye of your needle

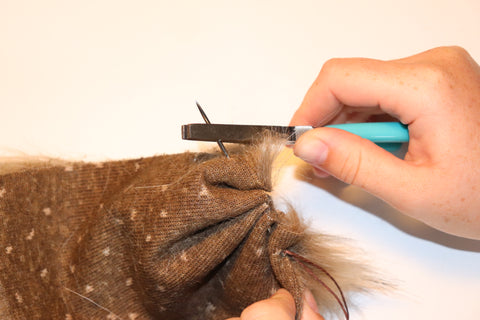
Step 2: Start sewing around the edges of your material. I start in the top right corner usually (with the fur "flowing" down). Sometimes the knit material on the back of the fur is really tough and I find it hard to get the needle and the string through it. This is when the pliers come in handy. If you're struggling with this, trust me, use the darn pliers. It will save your hands.


Step 3: Continue to sew all around the outside of your material square, ending where you began. Cinch the material together just a little bit to form a pocket

Step 4: Stuff your pom with Poly-Fil. You should used enough filler to fill the pocket without having to struggle to squish it all in there. Cinch the material together so that you can't see any of the filler.


Step 5: Secure your string and stuffing. I like to do this by holding the pom between my knees, doing a triple knot and pulling it tight HARD. You don't want any Poly-fil to be showing and you want it to feel secure.

Step 6: Usually I throw in a couple extra knots just so I am confident that it's secure. And that's it! You did it!
